Summary:
To summarize: coming from a Prusa Mk2, I am blown away at the speed, reliability, print quality and easy of use that you get with the Bambu Labs P1S. This printer seems like a great value if you are wanting a printer that makes high quality parts without the need to tinker.
The Whole Story
After 5+ years of running my Prusa Mk2s, I couldn’t help feeling like this printer was getting a little long in the tooth. My Prusa had done a great job from day 1, though it had its issues and required some fairly major repairs over the years. After replacing the main board, print bed, heater block, thermistor, belts, and bearings, the printer is still working well.There has been a lot of hype over Bambu Labs printers, and based on pretty much all videos I’ve seen, they deliver on the hype. That’s why I decided to upgrade from the old Prusa to Bambu Labs PS1. Here I will share my experience thus far, and compare the two.
When I bought my Prusa, I had been working with Markforged 3D printers. They print using carbon fiber filled nylon. All of the prints coming off of a Markforged were basically stronger and better looking than anything I could print on my Prusa. The carbon fiber filled filament hides layer lines well, so I decided to try to emulate this functionality on my Prusa. There were a few requirements:
Hardened Steel nozzle
Hardened Steel extruder gear
Enclosure
Dry box and bowden system for filament
I added all of the above list to my printer, and was able to print carbon fiber nylon with quality fairly close to what I would get from Markforged. Markforged develops their own slicer, and I’m sure their settings are dialed in perfectly for the material. I basically used
stock Nylon setting with a few tweaks.
My overall impression of the Prusa is that it’s a great printer that can be reliable and produce great parts as long as you do the necessary preparation for each print. If you skip on prepping the bed, checking z-offset, etc, you could be in for a failed print or even damage to the printer.
I would say it sits in the middle between “great for learning” and being a reliable tool. Keeping in mind, I had an Mk2 and there have been multiple updates since, so this isn’t the best representation of the current Prusa brand. That said, at least for the Mk4, they still sell it as a kit that you still have to fully assemble, so though the components are different on the newer units, the general design and assembly type haven’t changed all that much.
Enter BambuLabs
I’ll be honest, I was not interested in BambuLabs at all when I was hearing about their kickstarter and the super-speed their printer delivers. Over time I heard more and more about the speed and quality of printer, as well as ease of use. The X1 printers came with a pretty large pricetag, but eventually the P1P was released and became a very intriguing offer. At the same time, I found myself printing less, and mainly using PLA. I had started printing lithophane nightlights as gifts, and was considering starting to offer this as a product. But I didn’t feel like I could rely on my old Prusa enough to start a even a side-hustle,
BambuLabs announced the P1S shortly after I started considering the P1P, and with the $699 price, it seemed like a no-brainer. I ended up selling my Prusa and spent a few days without a 3D printer. I didn’t print that regularly, so I considered not replacing it. Over the years, being a person who 3D prints kind of becomes part of who you are. A few days after I sold my printer, a friend of mine mentioned to me about a 3D printing project he may have coming up. I pulled the trigger on the Bambu Labs P1S the next day.

First Impressions:
The Bambu Labs printer arrived about 3 days after I ordered. The packaging was great. I worked selling similarly sized equipment, including 3D printers, for many years, so I have seen a lot of different packaging. Bambu Labs is about as well packed as I’ve ever seen. Reinforced handles making the box easy to lift and carry. This is important for making it easy for UPS/Fedex to transport without having to roll the box around. They used foam around the corners and the entire printer was wrapped in large air-pack padding. My printer arrived in perfect condition, and was nearly completely assembled.
Setup
Remove a handful of screws that are keeping things in place, a few pieces of cardboard, and several pieces of tape. You have to install the spool holder (3 screws) and connect the LCD screen. That’s pretty much it. Download their app to your phone to connect the printer to wifi, and then the printer asks to update the firmware automatically. Overall its very simple to set up and get starting printing. They are not kidding about printing in about 15 minutes.
First Print
If you’re coming from a Prusa printer or using Prusa slicer, you’ll be relatively familiar with the slicer. There is a wide range of materials and brands that look to have preset profiles. I started with the included Bambu Labs green PLA. I printed a benchy (perfectly), and a lithophane. Both came out great and very fast compared to my old printer. I wouldn’t say its the advertised 10x faster, but a solid 3X faster. Slicing the same small objects on Prusa Slice resulted in a print time about 3X longer. The first concern I had was the noise. At times there is a LOT of fan noise. The fan cooling the electronics is a fairly steady loudness, like a loud Tower PC fan. But, when I had the printer printing a plate of PLA with the top off and door open (for more cooling), the printer was very loud, about 68 decibels. Too loud to take a phone call in the same room. I am running this in a spare bedroom, and with the door closed, even at its loudest its not a disruption to anyone. But It’s way to load to consider trying to work next to this printer.
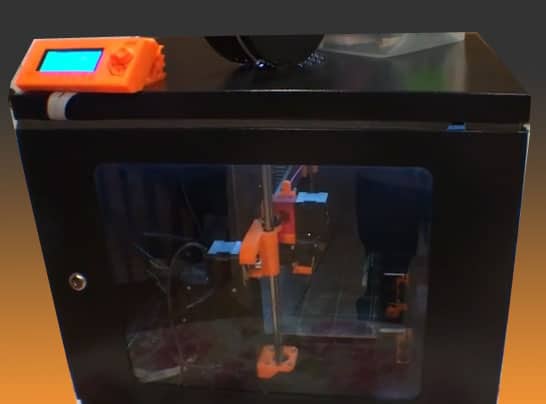
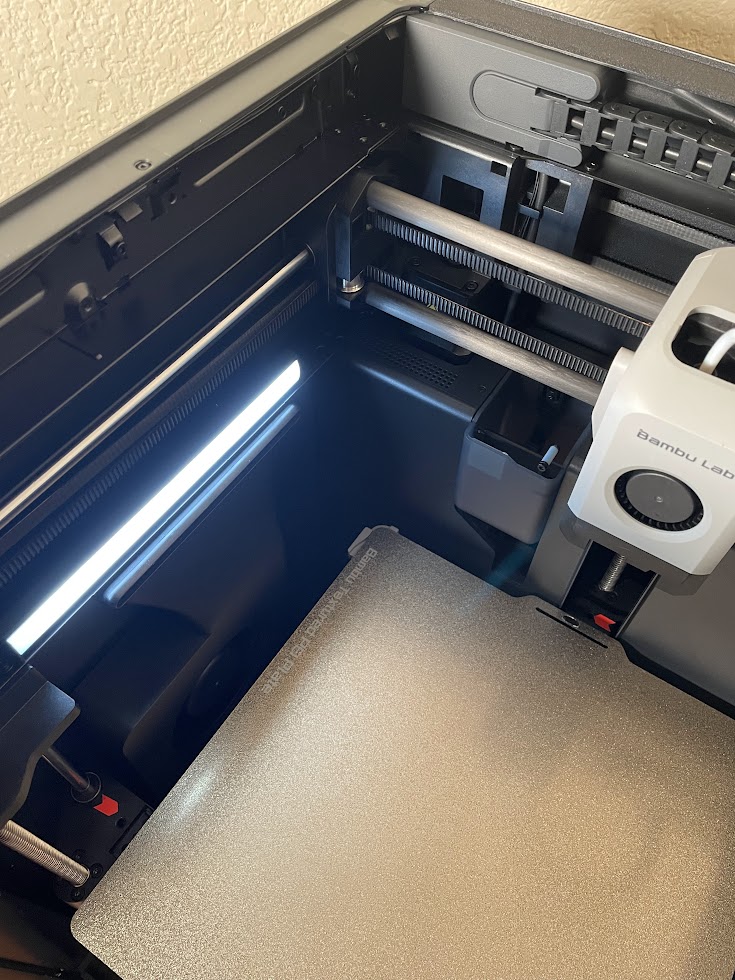
The printer looks great. Very sleek and polished. I’m glad I got the P1S with full enclosure. The glass top and door fully enclose the unit, with the door held closed with a magnet. I’ve been out of 3D printer sales for a few years, but comparing to industrial grade printers, I would say this printer feels at least like a $2000 printer. There is not much I feel is missing or needs to change about this printer. The only thing that is missing out of the box is some type of collection bin for waste plastic. There is a chute in the back of the printer where the printer purges filament. The waste plastic just falls out the back and lands on your desk or floor. A small collection bin would have been nice, but I don’t think there is a very elegant solution for this, so they omitted including anything, and let the markers of the world solve this very small problem.
One other “surprise” is that the glass top just sits flush on top. There is not actually connection or hinge, but there is a recess for the glass to sit in, and you can lift the front, so it function lick a lid on a hinge, but is really just sitting on top. I think think this needs to be changed or corrected, but it was a minor surprise to me, as I was expecting a hinge.
Comparison to Markforged
Bambu Labs does included a hardened steel nozzle and extruder gear, so this printer can be used with abrasive materials like carbon fiber nylon. For less than a $100 upgrade, you get functionality similar to the Markforged Onyx One, which currently sells for about $6000. Years ago, they sold for $3500, but even at the old price, the Bambu P1S is a fraction of the price. This is not to say the Bambu can do everything the Markforged does (or do it as well), but from someone who has used both, I would say its hard to make a case to buy an Onyx One when you can have several P1S printers for the same price.
The P1S actually has at least one benefit over the Markforged. It is direct drive. The markforged uses a bowden setup and is pushing the abrasive filament to the print head. This means its putting pressure on the bowden tubes that the filament travels through, and will (not can, will) eventually wear out the tube this can cause printing issues on the Markforged, and in the worst case, break through the bowden tube, ruin your print, and waste a lot of filament.
With this said, the Markforged printer uses a lot more high end components and is built like a tank. You can tell these printers are built to last a long time, and I’ve known them to be very reliable.
A commonality between the two printers is the cloud processing. Both Markforged and Bambu Labs have their own slicer that allows you to click “print” and send the job over wifi. The Bambu has a built-in camera and shows real time video over the slicer (Markforged’s low end printers don’t offer this video feature).
I was able to get similar features using a Raspberry Pi and Octoprinter with my Prusa Mk2s, so this isn’t a huge leap in functionality, but I will say Bambu’s slicer and phone app are more reliable and more elegant than Octoprint/PI combo. Compared to Markforged though, Bambu Labs is nowhere near as elegant. All of the UI, ease of use, and reliability of Markforged make you think you’re using an Apple product (I mean that as a complement). For the price, I don’t mind sacrificing the elegance and going with Bambu Labs.

My Setup
I’ve only used the P1S for a few days, but pretty quickly wanted to test printing with nylon. Since nylon is hygroscopic, you have to dry it out and keep it out of moisture. Wet material will cause steam while printing, which can cause poor extrusion, and produce very poor quality prints. To combat this, markforged includes a pelican case drybox with their printers. This is not elegant, but works. A bowden tube goes from the drybox to the printer. I use a plastic airtight food container with a bowden tube running from my box, butting up with the bowden tube on the P1S. There is a small opening where the two tubes meet, but I’m not concerned about that tiny amount of exposure. The Markforged printers have even more exposure to air at their extruder motor, and they work just fine. This is very effective and inexpensive solution if you want to keep your filament drive. Takes up some extra space, but I think it’s worth it to have more reliable quality. I worked with Markforged printers for years, and was always impressed with their build quality and capability to produce great prints reliably. That being said, the price tag is very high. The lowest priced Markforked printer costs around $5000. This is 7x the cost of a bambu Labs PS1. The basic functionality is about the same, with the Bambu offering a few extra bells and whistles: camera, LED lights, automated nozzle cleaning. Markforged does offer a much wider print bed, rectangle shaped instead of square. Depending on your needs this could give the Markforged printers a big advantage, but if the standard square size of a Bambu fits your needs, I find it hard to justify the extra cost of a Markforged Onyx One vs. a Bambu labs X1 carbon, or even a PS1 with hardened nozzle and extruder.
Bambu Labs PS1 Reliability
Over the few months that I’ve been running my PS1, the printer has proven to be very fast and reliable. There have been a few failures though. The only cause of print failures that I have seen have been due to poor bed adhesion. In every instance, I was printing thin parts (lithophanes) and they had come loose from the bed. I use the textured PEI sheet and I always add a layer of glue stick. The glue may not be necessary, but its been working well for me. (I did the same with my Prusa smooth PEI plate). I put a layer on the plate and re-use the same plate and glue for multiple prints. After a number of prints on the same glue, the bed adhesion is reduced and prints can lift from warping. I didn’t try very hard to correct this using settings, bed temp, etc. Cleaning the bed and adding a fresh layer of glue always worked. I probably go about 10 prints before replacing the glue. Aside from the bed adhesion issues, I haven’t seen any other print failures or even flaws on the prints from this printer. I regularly send prints to the printer remotely using the Bambu Handy phone app, with a high level of success. Its only been a few months and a few rolls of filament, but the performance and reliability have been what I always thought 3D printing should be. You hit print, and a part comes out, with very little interaction (or skill) required by the person running it.

I can say from experience that Markforged printers are built to run 24/7 and components that wear can be replaced relatively easily. It’s a well built and well designed machine, that will keep running (as long as you’re able to get replacement parts). Printers from Bambu Labs definitely look harder to service. The hot-end and extruder are accessible, but other wear parts look a bit buried. The fast-moving action of the Bambu printers leads me to think that these printers are going to be prone to problems once bearings start to wear. Time will tell on this, and thus far I haven’t seen any reports on social media of Bambu printers failing after X amount of use. Unlike kit printers like the Prusa, you didn’t build your Bambu Labs printer, and its obviously not designed to be easily disassembled by the end user. The ease of use and reliability of this printer are also in line with what you expect from most consumer appliances. It’s not really expected that the end-user will tear-down and rebuild the product. After a certain amount of use, if repairs are needed, is more compelling to simply replace the unit and enjoy the reliability of all new parts, rather than spending the time and expense of troubleshooting and repairing yourself. The Bambu P1S feels a lot like an appliance you buy to use, with little skill required to operate, much like an ink-jet printer. So I think a similar life cycle would be acceptable. It works great for a few years, eventually encounters problem due to wear or lack of maintenance, and the user is faced with replacing it, or considering if they even need own one.
Summing Up
If you want a great, reliable 3D printer that just works out of the box, this is it.
I recommend Bambu for people who want to produce 3D printed parts, but don’t want the act of getting a good part to be their hobby. This is a “click print, get part” situation.
If you want to spend about the same money and get a printer that is easier to tinker with and repair, I would go with the Prusa Mk4. If you have a smaller budget, the Creality Ender 3 S1 offers a similar option, though with lesser quality components compared to the Prusa, but still a great option at a much lower price.
With the speed, quality and reliability that I’ve seen, I find it hard to justify spending any more on a FDM 3D printer than the $699 for a Bambu P1S. With another $80 in upgrades, the P1S can print abrasive filaments, and seems relatively comparable to an Ultimaker or Mark Forged Onyx One, at 1/10th the price. Which is crazy.

Overture PLA - Works Perfectly with Bambu Labs!
As an Amazon Associate I earn from qualifying purchases