Many 3D printer build plates are covered with a sheet of PEI, which is a durable, temperature resistant plastic. Though it is a tough material, its typically very thin, and after enough prints, the PEI sheet on on your Prusa i3 Mk2 (or any other 3D printer using PEI) will need to be replaced.
This guide offer some insight on how to maintain your PEI sheet, avoid damage, and also how to replace the PEI sheet when needed.
Causes of damage
There are two typical causes of damage:
- Printed parts become fused to the PEI sheet and a chunk is pulled off when the part is removed
- The print nozzle gets too close to the print bed and causes damage.
Removing parts with metal spatulas can sometimes cause scratches or other damage to the PEI surface. Stubborn prints that are stuck to the PEI can sometimes pull a patch of the PEI surface off. On the Original Prusa machines, if your P.I.N.D.A. probe is adjusted too high, the nozzle can drag against PEI sheet and cause wear or damage during the XYZ Calibration.
Ways to avoid damage
-Proper P.I.N.D.A. probe height
There are ways to avoid damage to your PEI sheet, as well as ways to maintain the surface. Once the sheet is damaged to a point where you have areas that are not fit for printing, replacing the sheet is pretty easily done.
Especially if you’re building an Original Prusa kit, it is best to error on the side of your PINDA probe being too low. This will generally yield a first layer that requires adjusting, but better safe than sorry. The PINDA detects the print bed which sets the initial height of the nozzle. Further calibration is done, but if your PINDA is much higher than the nozzle, then by the time the PINDA detects the bed, the nozzle is already touching the PEI sheet. This could mean the nozzle drags across the PEI surface and can easily wear through sections of the sheet, as the calibration on the Prusa i3 tends to make a lot of repetitive moves with the print head.
It’s also a good idea to have your finger on the power button in case the nozzle does come in contact with the print bed, you can cut power and save from damage.
Following the calibration instructions and placing a sheet of paper on top of the bed does help spare your bed if the nozzle is too low, but its best to kill power and lower your PINDA if the nozzle is rubbing against your page of paper at the start.
Keep parts from sticking
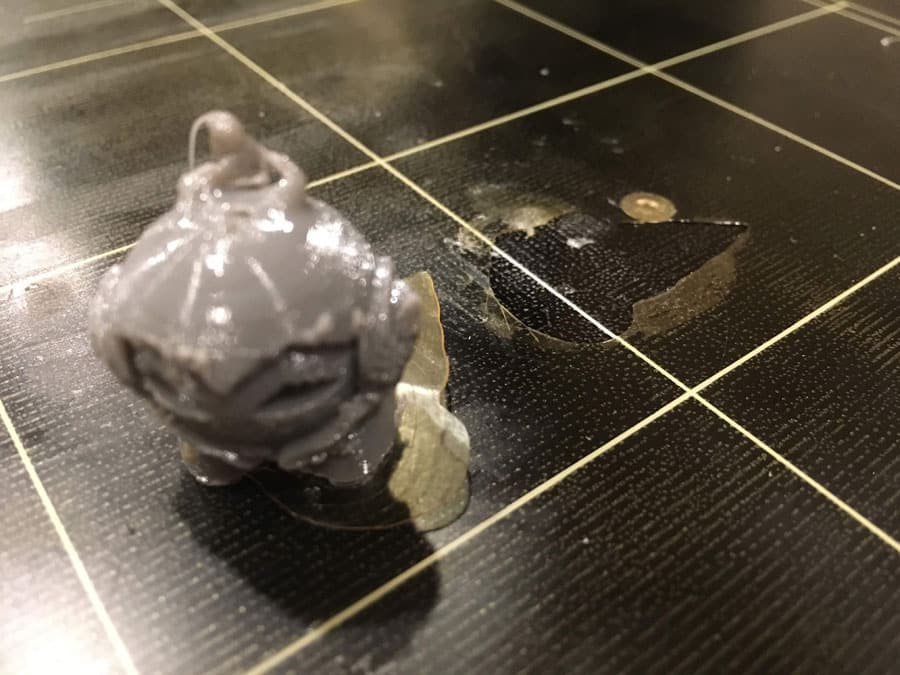
My first PEI sheet was damaged by the nozzle when I have my PINDA probe too high. The 2nd damage was a chunk that I pulled off after printing some flexible material. I had used glue stick on the PEI sheet, but apparently not enough. I ended up having to pry the 3D Hubs Marvin model and a chunk of PEI came with him. The fact that the Marvin printed very poorly just added insult to injury. I admittedly wasn’t as patient about trying to remove the model, but I had a spare PEI, and figured if it’s stuck, it’s stuck.
The lesson here is to consider using something like blue tape when printing flexibles which are known to fuse to PEI. A liberal amount of gluestick also seems to work fine, but don’t skimp, and I suggest cleaning and re-applying fresh glue between prints. The print that ruined my PEI sheet was printed on top of the same layer of glue twice. Obviously, this was not enough of a barrier.
Replacing your PEI sheet
Replacing the PEI sheet is actually not too difficult. (I’ve done this twice).
My first time, I followed the Prusa official instructions (available here)
Here is a brief list of actions for replacing the PEI sheet according to their instructions
Prusa’s Method:
- Power off the Printer
- Remove the build plate from the printer
- Place the build plate in the freezer
- Once frozen, remove the PEI sheet (freezing makes it easy to remove PEI from adhesive)
- Soak a paper towel with D-Limonene and place on top of the print bed
- Place the printbed in a plastic bag to keep the D-Limonene from drying
- Allow this 40+ minutes to dissolve the adhesive
- Scrape the adhesive off of the print bed.
- Repeat the D-Limonene “soak” and scrape until clean
- Give the bed a cleaning with IPA
- Install the new sheet
This method works just fine, and though removing the build plate is not that difficult, its a bit more time consuming and requires removing wires from the RAMBO, removing wire wrap, etc.
On my first PEI sheet replacement, I followed Prusa’s instructions. It took longer, but it was easier to scrape the adhesive with the build plate out in the open. I also used Goo Gone rather than D-Limonene. Its citrus based and work well enough that I didn’t feel a need to look for an alternative. If you’re replacing your original PEI sheet on a Prusa machine, consider that the PEI sheet they use is pretty thin (about .175mm I believe), and trying to remove without first freezing may result in the sheet coming off in small pieces. I replaced the sheet with thicker .25mm PEI (available here), so the 2nd time I had to replace the sheet, I skipped some steps.
Here is the modified method I used the 2nd time:
- Power off the printer
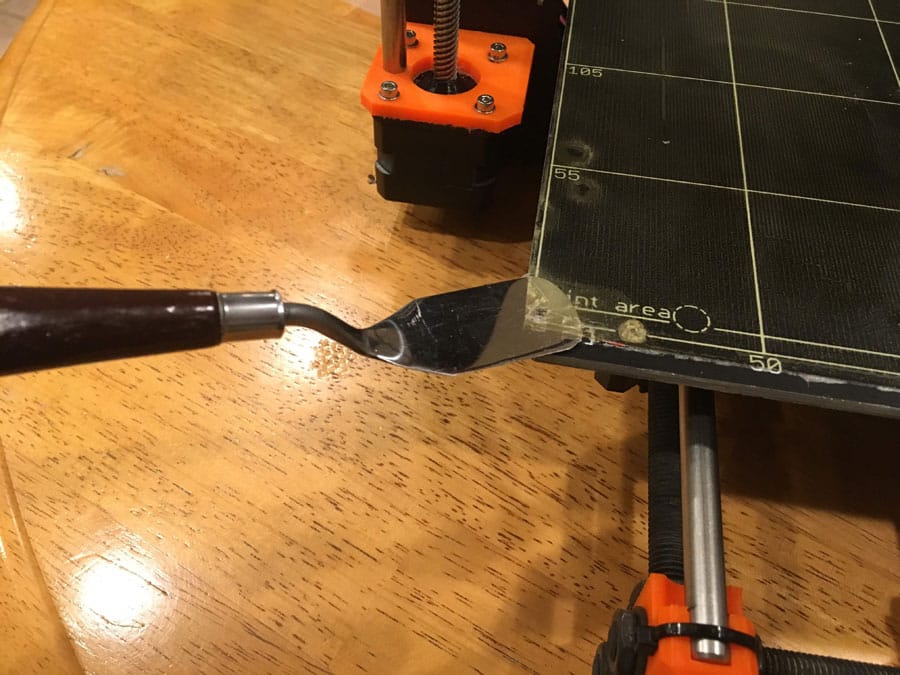
- Use a metal spatula to lift a corner of the PEI sheet
- Remove the PEI sheet by lifting and pulling up at an angle.
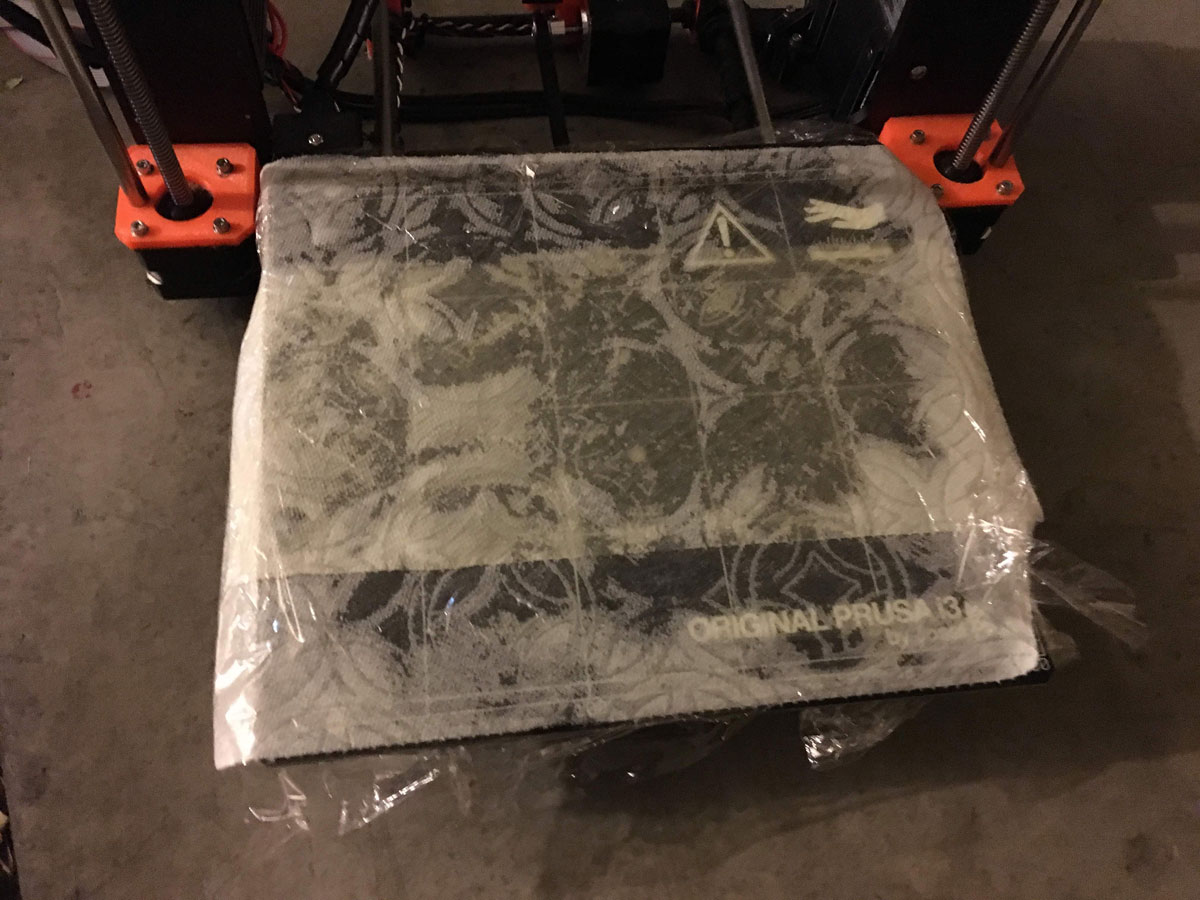
- Soak a paper towel with Goo Gone and place on the build bed
- Cover the build bed with plastic wrap
- Wait a few hours for the adhesive to dissolve
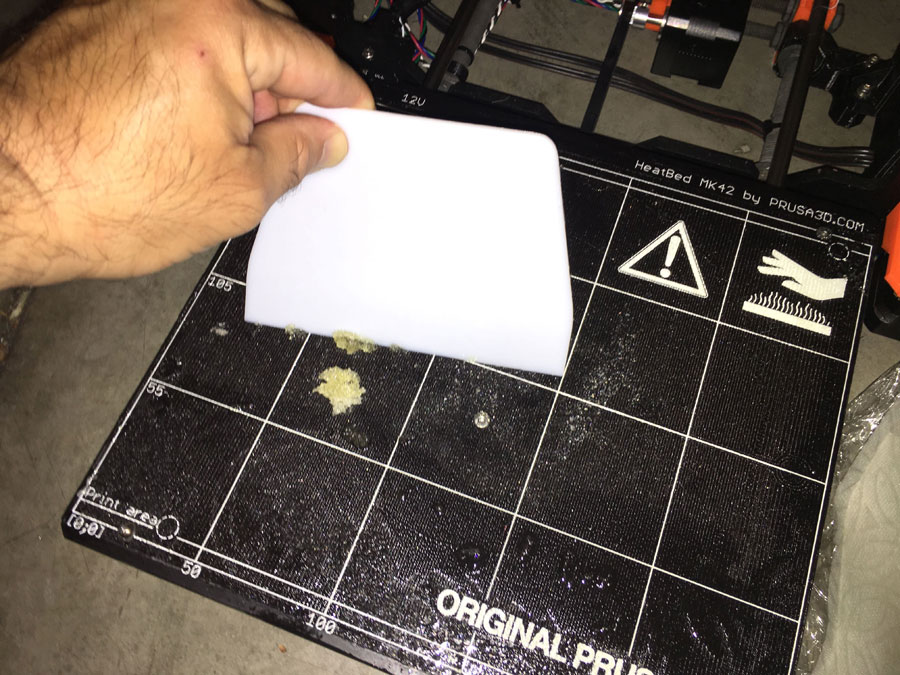
- Use a scraper to remove the adhesive
- Repeat the soak / wait / scrape routine until all adhesive is gone
- Clean the bed with Acetone
- Clean the bed with IPA
- Install the new PEI sheet
The 2nd time I needed to replace the PEI sheet, I kept the print bed mounted to the printer and simply peeled off the PEI sheet in a few pieces. It was stuck on the bed really well, but once I got a corner lifted, most of the sheet came off in one piece.
The first replacement I did was placing the original PEI that came with the printer, which is slightly thinner than that .25mm PEI sheet I used for replacement. The thicker sheet is likely more durable, and more likely to stay together if you’re trying to remove without freezing the bed. So if you’re replacing the original PEI, I would recommend removing the bed and freezing as recommended by the official Prusa instructions. If replacing a thicker replacement PEI sheet, then removing without freezing seemed to work just fine.
After removing the old PEI, I soaked a paper-towel with Goo Gone, placed it on the build bed, and covered it with plastic wrap.
I let it sit for a few hours, then scraped the glue with a plastic scraper. After removing as much of the adhesive as I could, I re-applied more Goo Gone and let it sit overnight. The next morning, the balance of the adhesive scraped off relatively easily.
I cleaned the bed with Acetone, then IPA. Once the bed was perfectly clean, I went ahead with applying the new PEI sheet, basically using the same method as described in the Prusa Instructions: start by getting one side attached while leaving on most of the adhesive backing. The slowly removing the backing and smoothing more and more of the PEI sheet to the bed. Once its all attached, I trimmed the excess with a razor.
I used a plastic scraper to smooth the PEI. You can cover the scraper with a cloth to protect the new PEI while smoothing.
The original method of removing the bed per Prusa’s instructions is the more thorough way to do this, but keeping the bed mounted worked fine and probably saved a good 30 minutes.
If replacing the PEI is what you consider “regular maintenance”, then you’ll probably want to just keep the plate in place.
PEI Sheet maintenance
If your PEI surface is in good shape but parts aren’t sticking as well as they used to, there are a few things you can do to improve adhesion.
Obviously, the first thing to do is make sure your bed is level and your first layer height is snug.
If calibration is not the issue and the PEI seems to have lost it’s “stick”, I’ve had very good luck with this method:
- Clean the print bed with warm water – this works especially well if you’ve been using gluestick on the PEI. Dawn dish soap also helps to remove grease.
- Sand with fine grit sandpaper, 1000-2000 grit. You want to scuff the surface, you don’t want to sand for smooth surface. I use multiple short strokes in one direction (like back to front), then repeat left to right.
- The idea is to rough up the surface and give plastic more to grab.
- Clean with acetone. I use paper coffee filters to clean my print bed. Soak one with acetone and clean the whole bed after sanding.
This method seems to bring my build surface back to good adhesion. Between prints I try not to touch the bed, and for PLA prints, the PEI surface is basically maintenance free. If the surface needs cleaning, I clean with an IPA soaked coffee filter. The coffee filter is a tip I got from a 3D print forum, and makes a lot of sense. It is lint-free, disposable, and very cheap. I also use a pump dispenser bottle for my IPA. Makes it very convenient to give a coffee filter a soak with only a couple presses on the pump.
With the invention of new spring-steel build beds, it may become more common to replace the entire spring steel sheets. But for those of us who haven’t upgraded to a removable bed, replacing and maintaining the PEI sheet is relatively easy. Even with the new spring-steel removable sheets, most still ship with a PEI film, so maintenance and replacement options may still be useful.
Replacement PEI Sheets available at Amazon.com
As an Amazon Associate I earn from qualifying purchases